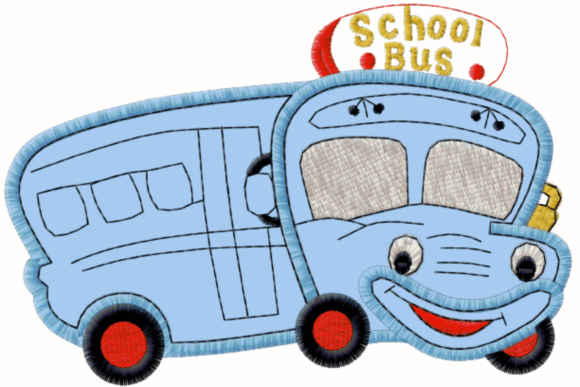
Cute Bus School Design: A Designer’s Practical Review
As a designer who spends more time staring at stitch maps than actual thread spools, I have learned that the difference between a charming handmade item and a tangled mess often comes down to the initial design choice. When I first loaded the Cute Bus School file into my editing software, my immediate reaction was one of relief. In a market saturated with overly complex, dense, and frankly exhausting graphics, this design offers a breath of fresh air. It captures the nostalgic joy of the classic yellow school bus but translates it into a format that is genuinely friendly for machine embroidery.
This is not just a graphic; it is a functional asset for anyone in the craft business. Whether you are an Etsy seller preparing for the autumn rush or a hobbyist looking to personalize a gift, understanding how this design behaves under the needle is crucial. Let’s break down why this specific Back To School themed piece works, where it shines, and where you need to exercise caution.
First Impressions: Mood and Visual Personality
The mood of Cute Bus School is undeniably lighthearted. The cartoon style strips away the rigid realism of a actual vehicle, replacing sharp industrial lines with soft, approachable curves. For embroidery, this is a significant advantage. Sharp corners and tiny, intricate details are the enemies of clean stitching, especially on textured fabrics. By opting for a playful aesthetic, the design inherently reduces the risk of puckering and thread breaks.
Visually, the layout feels balanced. It does not scream for attention with excessive density; instead, it invites a second look. This makes it versatile. It is not so childish that it cannot be used on adult apparel, yet it is whimsical enough to delight a child. This duality is rare in niche seasonal designs and adds substantial value to your library of design assets.
Real-World Application: From Mockup to Finished Product
To truly evaluate an embroidery design, you must imagine it stitched out. I recently considered this design for a custom order involving a canvas tote bag. The client wanted something recognizable but not overwhelming. Cute Bus School fit the brief perfectly. On a natural cotton canvas, the bright yellows and contrasting black outlines popped without looking cheap. The scale was appropriate for a standard 5x7 hoop, leaving plenty of negative space that allowed the fabric texture to breathe.
Beyond tote bags, this design excels in sweatshirt embroidery. The slightly thicker line work typical of cartoon styles holds up well against the fuzzy surface of fleece or French terry cloth. If you are creating a personalized gift for a teacher or a student, this motif serves as a strong central element. You can easily add names below the bus using a complementary font, turning a simple graphic into a bespoke handmade product.
For those running a small shop, consider this for embroidered patch production. The self-contained nature of the bus shape means it cuts cleanly if you are using a satin stitch border for a merrowed edge look. It also translates well to baby embroidery projects, such as bibs or onesies, provided you adjust the size to fit the smaller garment area.
Technical Considerations and Fabric Compatibility
While the design is forgiving, it is not immune to the laws of physics. Here is where your experience as a maker comes into play.
- Fabric Texture: On smooth quilting cotton or broadcloth, the satin stitch elements will lie flat and shiny. However, on highly textured towels or waffle-weave fabrics, you may need to increase the density slightly or use a topping stabilizer to prevent the stitches from sinking into the pile.
- Stretchy Materials: If you are applying this to a knit t-shirt, proper stabilization is non-negotiable. The width of the bus means there is a moderate amount of pull. Use a cut-away stabilizer for garments that will be washed frequently to maintain the shape of the finished product.
- Dark Fabrics: The design relies on bright, cheerful colors. If stitching on navy or black fabric, ensure your thread colors have high contrast. You might need to add a white underlay or background patch if the design does not already include one, to prevent the dark fabric from showing through the lighter yellow areas.
One area to watch is the wheel details. Depending on the specific stitch density of the file you purchase, small circular elements can sometimes become bulky. I recommend doing a test stitch on scrap fabric identical to your final project material. Check if the wheels lay flat or if they create a raised bump that distorts the surrounding fabric.
Enhancing Brand Value and Customer Trust
For commercial embroiderers and Etsy sellers, the quality of your digital files directly impacts your brand reputation. Using a clean, well-digitized design like Cute Bus School signals professionalism. Customers may not know the technical terms, but they recognize quality. A crisp outline with no stray threads or gaps builds trust.
When creating printable mockups for your online listings, this design photographs beautifully. Its clear shapes and bold colors translate well to digital images, helping your small shop product stand out in search results. Consistency is key; if you establish a style of playful, high-quality Back To School items, this design becomes a cornerstone of that collection.
Practical Notes for the Embroiderer
Before you hit "start" on your machine, keep these practical tips in mind:
- Check the License: Always confirm whether the digital embroidery file allows for commercial use. Most designers offer different licenses for personal versus commercial craft business applications.
- Thread Color Matching: Do not rely solely on the default color map in your software. Compare the thread chart to your physical inventory. Sometimes, swapping a standard yellow for a goldenrod or a mustard tone can elevate the design from generic to boutique.
- Hoop Size Verification: Ensure the design fits comfortably within your hoop with adequate margin. Crowding a design near the edge of the hoop increases the risk of hoop burns and skipped stitches.
- Test Stitching: Never skip the test run. Stitch out the design on a similar fabric weight. Inspect the running stitch connections and the transition between fill areas. This step saves you from ruining expensive garment blanks.
In conclusion, Cute Bus School is a reliable, versatile addition to any embroiderer’s toolkit. It balances aesthetic appeal with technical practicality, making it suitable for a wide range of custom apparel and home decor items. By respecting the material constraints and preparing your workspace properly, you can transform this simple digital file into a high-value embroidery project that customers will love. It is a reminder that in embroidery, simplicity, when executed well, often speaks louder than complexity.